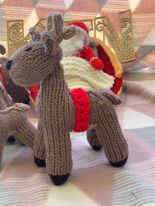
Reindeer Pattern By Kaz Kew
Reindeer Pattern By Kaz Kew
For Brenda

to fit my Santa and Sleigh pattern
Reindeer stands about 18cm tall, 6cm wide and 18 cm long,
All knitted in dk on 3.5mm needles
Materials used
Colours of wool used
Brown, Main Colour (MC) 30g
Beige, antlers and belly 10g
Black, feet and eyes/nose 10g
Red, collar and rudolph’s nose oddments
Optional Materials
1 Metal embellishment for harness
1 bell
1m Wax cord (reins for 3 reindeers)
Abbreviations used in this pattern
K Knit
P Purl
K2T Knit 2 together
P2T Purl 2 together
KFB increase (knit into front and back), or your preferred method of increase
St stitches
Ss stocking stitch
(--) x? repeat instruction inside bracket the number of time stated {e,g x2 = twice}
Yo Wrap yarn over needle, to make another stitch
Pattern
Legs (make 4) starting at the feet and
In Black
Under Belly (make 2)
Joining legs and under belly together
With RS facing (ON ALL PIECES) place pieces as follows
on one needle knitting ready to purl next row
1 Leg, 1 under belly, 2 legs, last under belly,
last leg 44st
To make up body
Sew down front seam up to and including the 3 cast off
stitches at the top of the legs.
Sew leg seams by folding the leg in half and sewing row
ends together.upto but NOT including the 3 cast off
stitches at the top.
Stuff the legs but do not over stuff.

Sew the two sets of 3 cast off stitches at the rear.
Closing seam on under belly. Sew row ends on under
belly to the nearest set of 3 cast off stitches on each leg.
Partially stuff the stomach before sewing the cast on
edges (of the under belly) together.
At this point you will see a clear definition of leg joining the body, slowly add more stuffing to the top of each leg (through the 12 st gap) to stop this. Make sure the neck is firmly stuffed before
sewing up the back seam to close the gap.
Head (beginning at the top)
Ears (make 2)
Tail
Antlers (make 2 )
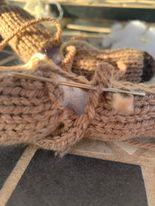
Collar
Cast on 25st in Red, Loosely cast off 25st. (Optionally,
place a bell on collar)
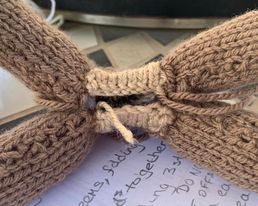
Waist Band
(Alternative Waist Band) Place an embellishment on
back of reindeer
Cast on 20st in Red, Loosely cast off, attach to embellishment
and attach to reindeer.
Eyes and Nose
Nose 3 stitches (in black or red) in a triangle shape on front
and lower part of head
Eyes 1 stitch for each eye approx 4-6mm long
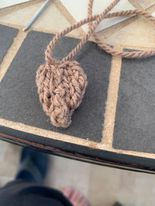
Reins (For Three reindeer pulling sleigh)
Cut 2 lengths of wax cord approx 50cm long. Place both
around front of the first reindeer, placing in waistband to hold in
place. Split so that one cord is going left around reindeer no 2
and the other goes right around reindeer no3. Again securing
in waistband. Left rein goes to santa's left hand, right rein to
Santa's right hand.

This FREE Pattern was created for the use of FB group
for the love of all crafts
The pattern is not for sale and should not be sold.It is not
available anywhere except this FB Group.
The members of the group can use this pattern to create
as many items as they wish, to sell, gift or donate.
If members are asked for the pattern. It would be kind if the
member points ANY non members to the group, for a copy
of this pattern and not print out and/or give copies away

Another great looking pattern. Do you have a website I can register with. Thanks.
ReplyDeleteHi there, thanks for the feed back.
Deleteno website, sorry. I wrote these patterns for a FB group who liked my knits. If my creations are popular in group I put the pattern on here so I can add it to Ravelry